Android Phone – Additional Email Settings
- Κατηγορία: Ρυθμίσεις Email
- Γράφτηκε από Nick Athanasoulas
- Permalink


Scroll To Top
Email Signature Setup:
If you haven’t set your account on Android Phone/Tablet yet, please follow the previous tutorial Android Phone Email Client Setup Instructions.
This guide will walk you through the steps on adding an Email Signature on your Android Phone Email Account.
First of all, you have to open the email that was sent to you regarding your signature.
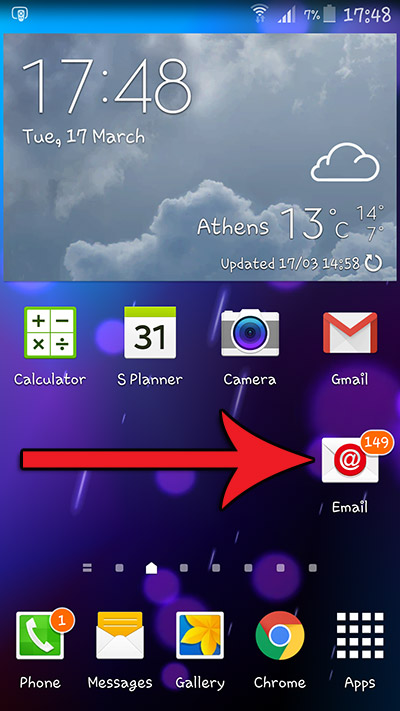
Go to «Email» App:
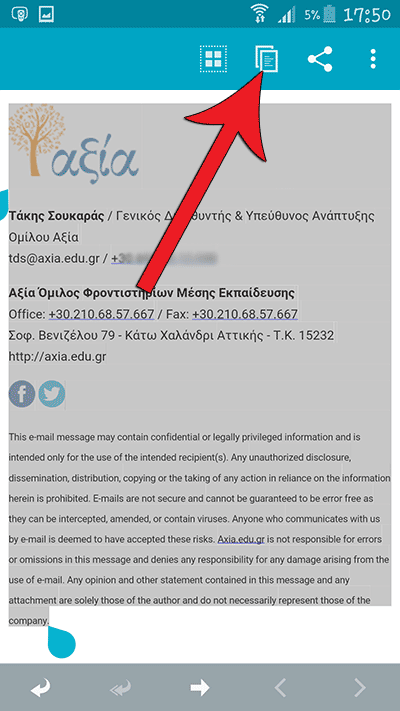
Open the Email that was sent to you regarding your signature:

Select your Signature and then click on «Copy»:
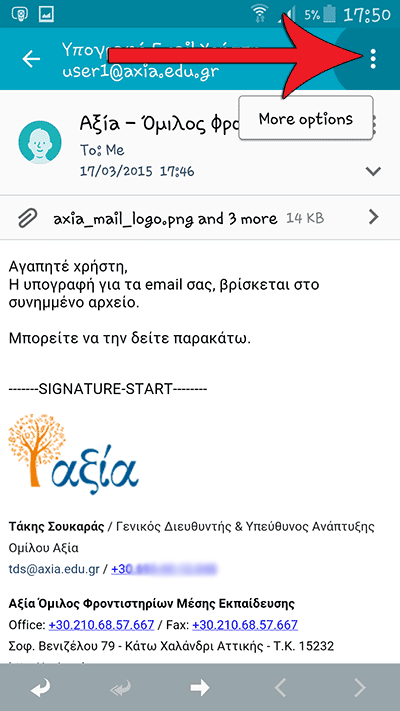
Click on «…» Menu Icon:
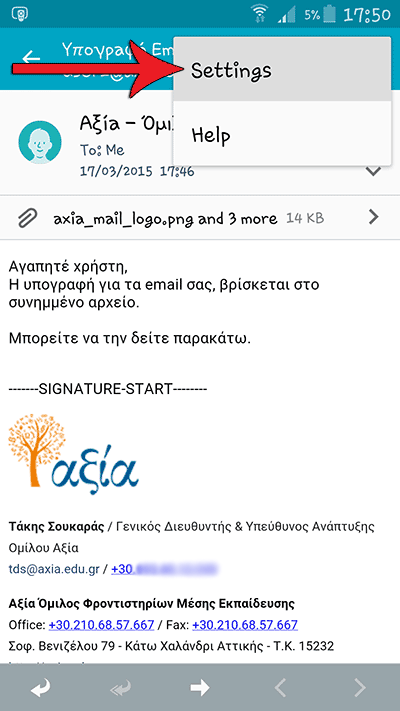
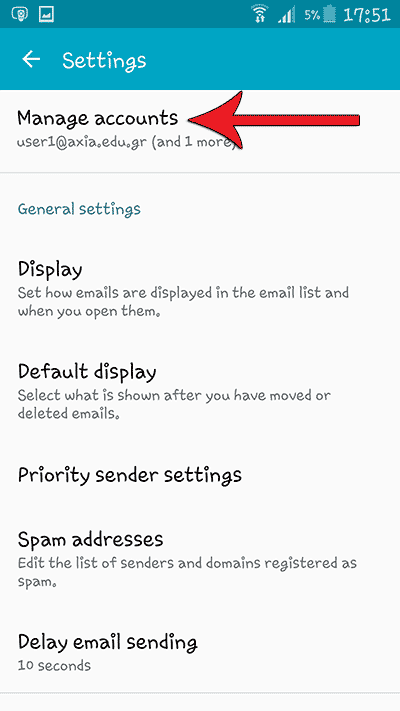
Go to «Settings»:
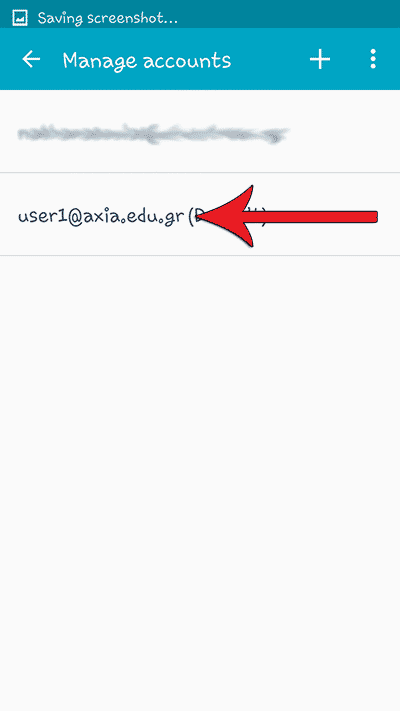
Go to «Manage accounts»:
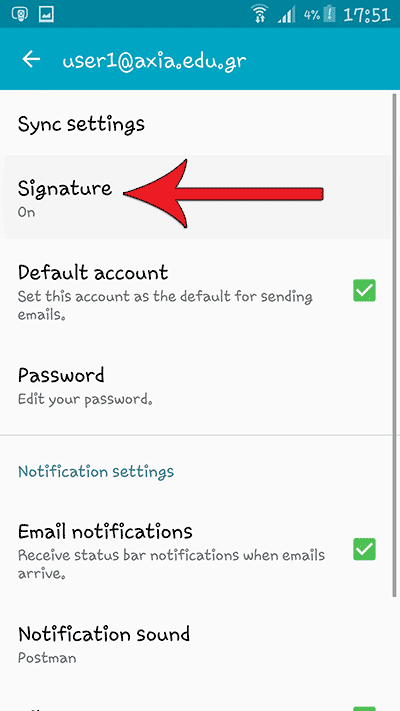
Select your account:
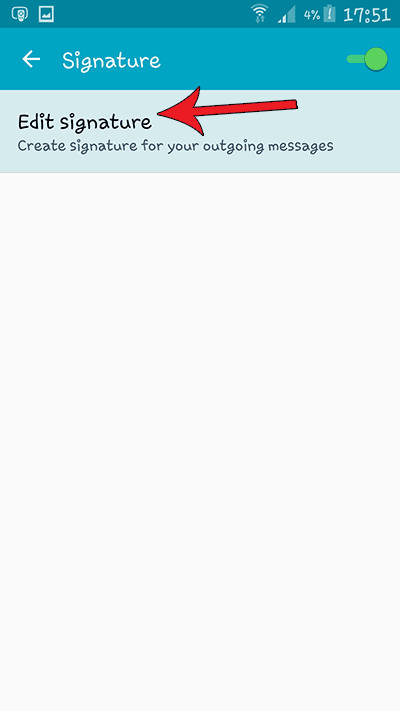
Select «Signature»:
Select «Edit signature»:
Paste the copied text:
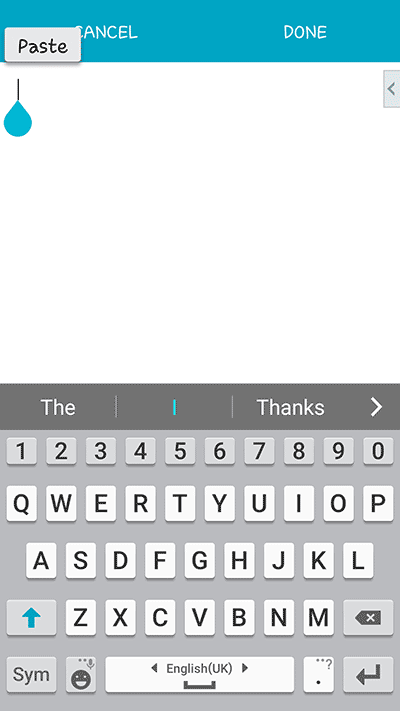
Click on «DONE» and an error message will show up:
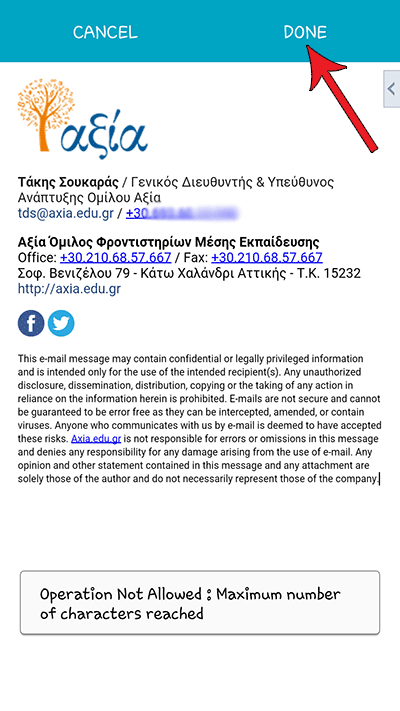
Android «Email» App doesn’t allow a lot of characters for your signature. You’ll have to shorten it by erasing some info.
DO NOT ADD ANY IMAGE TO YOUR SIGNATURE, BECAUSE ANDROID «EMAIL» APP DOES NOT SUPPORT IT!
I made some changes so the signature will not exceed the characters limit:

Click on «DONE».
If it’s small enough it will save your new signature.
Create a New Email Message:
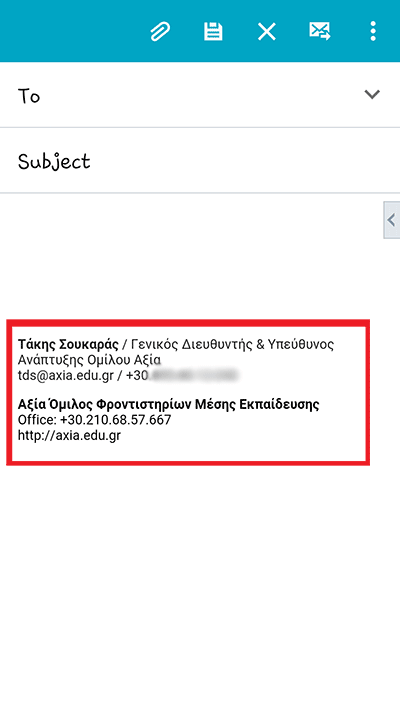
If everything is ok, you should see your signature automatically generated in your email message.
You have successfully setup your signature.
You are done!
If you are not fully satisfied with your signature, you can read this guide K-@ Pro Client Setup Instructions on Android Phone that describes K-@ Mail Pro App, which supports signature with images and rich text.